Installing MySQL database
In this lesson we will cover the installation of wamp server on an windows PC, which will install a MySQL database engine as well, and we will focus on the MySQL database.
In order to download the wamp server go to http://www.wampserver.com/, click the download button as shown in the figure 1.
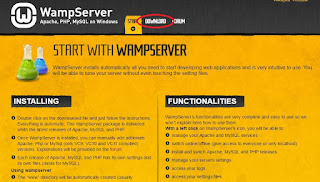
Figure 1: Download wamp server
In the download session click the appropriate version for your machine. On the window that pops up click the link marked with number one in order to download the Visual Studio 2012 VC 11 vcredist_x64/86.exe file if you don't have it and than after installing that file click the link marked with number two shown in the figure 2 to download the wamp server.

Figure 2: Wamp server download steps
After download process has finished install the wamp server normally like every other program and give permission to pass traffic through firewall.
After completing the installation of wamp server run it and wait for the wamp icon in the taskbar to become green as shown in the figure 3.
After the icon has turned green, click on it and the menu shown in the figure 4 will apear.

Figure 4: Wamp server menu
In the menu shown in the figure 4 click on phpMyAdmin element highlighted in the picture and you will se the login page as shown in the figure 5.

Figure 5: Login phpMyAdmin
The default username to login on phpMyAdmin is root and you can leave the password blank as it is. After clicking the GO button, you will get loged into the phpMyAdmin, as seen in the figure 6, where can create, delete databases, manage tables etc. actions which we will see in the upcoming lessons.

Figure 6: phpMyAdmin
(please report broken link in the comment)
In order to download the wamp server go to http://www.wampserver.com/, click the download button as shown in the figure 1.

Figure 1: Download wamp server
In the download session click the appropriate version for your machine. On the window that pops up click the link marked with number one in order to download the Visual Studio 2012 VC 11 vcredist_x64/86.exe file if you don't have it and than after installing that file click the link marked with number two shown in the figure 2 to download the wamp server.

Figure 2: Wamp server download steps
After download process has finished install the wamp server normally like every other program and give permission to pass traffic through firewall.
After completing the installation of wamp server run it and wait for the wamp icon in the taskbar to become green as shown in the figure 3.

After the icon has turned green, click on it and the menu shown in the figure 4 will apear.

Figure 4: Wamp server menu
In the menu shown in the figure 4 click on phpMyAdmin element highlighted in the picture and you will se the login page as shown in the figure 5.

Figure 5: Login phpMyAdmin
The default username to login on phpMyAdmin is root and you can leave the password blank as it is. After clicking the GO button, you will get loged into the phpMyAdmin, as seen in the figure 6, where can create, delete databases, manage tables etc. actions which we will see in the upcoming lessons.

Figure 6: phpMyAdmin
(please report broken link in the comment)

Comments
Post a Comment