Posts

Showing posts from December, 2016

Exercise Intermediate, part 2: Chat application - Complete DatabaseInteraction

Image
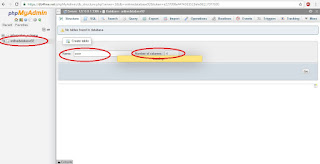
This part is a continuation of Exercise Intermediate, part 1: Chat application - Establish connection so before starting this part of the exercise make sure to have completed the part 1 first. In order to complete the DatabaseInteraction class we need first to determine the tables that we must create on the database. In a chat room we need to know the peoples that a writing and the conversations they are making. As many problems have many solution, our problem has many solutions as well. We can determine to create a table for every user that is registered to our database where we can store the chats of every user or we can create a table chat and a table users which would be more acceptable if we would have in mind the normalization rules. For the table users, we would need a column username which would be our primary key because they must be unique, we would need a field password as well, we can add fields name and surname as well but this are not mandatory fields. In the table ch

Exercise Intermediate, part 1: Chat application - Establish connection

Image
Request: Create a chat application using Java programming language and the MySQL database. Solution Before starting this lesson you need to follow this lesson Online MySQL database lesson to have an online MySQL database if you don't own one already. After ensuring an online MySQL database, in order to be able to communicate to a database we need a driver. In this case we will use a JDBC driver from MySQL that we will download from the website of mysql.com which is a free driver with a GPL certificate. This driver can be downloaded at href="http://dev.mysql.com/downloads/connector/j/ . In this page, which in the time of this tutorial is as shown in the figure 1, we select to download the zip file through the download button as marked in the same figure. Figure 1: MySQL JDBC driver download page After you click on the download button you should see a page similar to the one shown in the figure 2 where you should find the link shown in the same figure if you scroll down

Online MySQL database

Image
In order to build complete and fully functional applications sometimes we need databases to store and manipulate data, but we do not need to access them only from the LAN but even through the internet. In order to have an online database there are several ways like exposing a locally owned server to the internet or if you own a web host account they usually come with MySQL database which you can use for other purposes as well except storing the data of the website. Except this two ways there are some free online MySQL database providers as well. This is the what we will cover in this lesson, how to have a MySQL database online for free. This kind of database that we will see in this lesson are for experiments only because they are not reliable and they are slow. We will use the online database in upcoming lessons so we need to have one ready for those lessons. In order to have this free online database we need to go to db4free.net . After you go to the link mentioned previously, in t

C++ Beginner: Lesson 4 - Tic Tac Toe game

Image
In this lesson we will cover if condition which we saw in the previous lesson as well, and we will cover the switch control statement too. Other elements that we will cover in this lesson are one and two dimensional arrays and we will see the for loop as well. During this lesson we will develop the tic tac toe game. In order to do so, we need to create a new project as we have seen in lesson 1 , but in this case we will call the application TicTacToe and the class will be named TicTacToe as well as shown in the figure 1. Figure 1: TicTacToe game The first step to create the TicTacToe application is to prepare the layout of the window. From the toolbox panel we take the Grid Layout element and drag it into window and than select the window and press the Lay Out in a Grid button as shown in the figure 2. Figure 2: Grid layout After the setup of the layout we start dragging and dropping into the window 9 QPushButton elements as shown in the figure 3 bellow. Figure 3: Add butt