Posts

Showing posts from 2017

Free host and domain

Image
In order to be able to have a website online are needed a server which is used to host the website and a domain which is linked with the IP of the server where is hosted the website. In order to get a host and a domain the programmers must pay, but at 000webhost.com can be taken free subdomain and host. At 000webhost.com after sign up must be confirmed the email address entered during sign up. Figure 1 shows an example of filling the information during the sign up that we'll use in this lesson. Figure 1: Sign up at 000webhost.com The information that are used in figure 1 must be replaced as required. First is the email, after email is the password field and the third input field is the field where is entered the name of the website and bellow is updated the domain of the website which will be created. After the creation of the account the email address must be confirmed. After confirming the email address, the created website is displayed as seen in figure 2 bellow. Fig

VOIP Project: Creating PBX - Part 9

Image
Before being able to create the application of the system, another step should be made first, the creation of the PBX functionalities. During the development of this project, the best alternative where to create the PBX functionalities was considered the Bitrix24 at bitrix24.net . Bitrix24 offers no limitation regarding the number of the user that can be created in the free plan, so unlimited sip accounts can be created. Creating the sip account in Bitrix24 is a straight forward process. The first step in order to create the sip accounts is to create the management account by signing up in the bitrix.com website. After creating the management account in the page that follows we need to create a Bitrix24 account as by following the steps shown in figure 1: Figure 1: Create Bitrix24 In the next page that follows complete the information required, similar to the ones shown in figure 2: Fill Bitrix24 info In the management panel that shows next can be found a lot of options,

VOIP Project: Building PJSIP library - Part 8

After downloading the PJSIP project from pjsip.org website and installing the Visual C++ IDE, PJSIP project must be opened with Visual C++ IDE. In the solution explorer where are listed all the solutions of the PJSIP project, pjsua project must be set as the starting project. Before starting to build the PJSIP project, it is necessary to check and properly set some configuration for the resulting libraries. In order to be able to build compatible libraries, it is necessary that the configuration of when building the PJSIP project, which will generate the need libraries, to be the same with the configuration of the compiler that will be used when building the final application. The first concern of course must be the compatibility of the versions of the compiler. The compilers must be both 32 or 64 bit, which means that when running the compilation of the PJSIP project the target platform must be the same as the target platform which will be used during the development of the appli

VOIP Project: Preparing environment - Part 7

In order to implement the system shown during the design process shown in the previous parts, there are several steps needed to be followed in order to setup the framework of the project. In order to build the PJSIP library it is necessary to have the Visual C++ IDE in a Windows environment. During the implementation of project, the Visual C++ 2015 Express Edition is used. Of course the PJSIP project must be downloaded as well from the pjsip.org website. During the development of this project the version 2.4.5 was used. And alternative to Visual C++ 2015 Express Edition, a relatively more complex one, in order to build the PJSIP library is the usage of MingW combined with MSYS. When using this tools it is necessary to collect other tools in order to be able to build the PJSIP library. After having the above mentioned tools, it is necessary to have a server where to host the MySQL database used in this project. During the development of this project a server connected with db4free.n

VOIP Project: Patterns - Part 6

In order to develop good and stable software a software engineer should make use of the standardized accumulated knowledge of other engineers as well, know as patterns. Patterns are defined by Shaffer as follow: “Experienced software designers learn and reuse patterns for combining software components …A primary goal of design patterns is to quickly transfer the knowledge gained by expert designers to newer programmers.” (A.Shaffer, 2013, p. 12), which shows that the patterns are a result of experience. In this project are implemented several patterns and is paid a special attention to avoid the “Anti-Pattern” processes, which means "a common design pitfall. An anti-pattern is called this because many design patterns are designed to avoid such pitfalls.”(Ezust & Ezust, 2007, p. 342) The singleton pattern is one of the patterns implemented in the project. Singleton pattern is a pattern which can be implemented in several high level programming languages and among them is c++

VOIP Project: Design application - Part 5

Image
In this part we will see in details the UML diagram of the application which will be developed during this project and the specifications of this diagram. In the figure 1 bellow is shown a preview of the class diagram of the application developed with Qt Creator using PJSIP library. In the diagram below are omitted other external classes which are not used directly by the application. On top of figure 4, within the grey rectangle, are shown the classes of Qt library which are extended by the created classes by the programmer. The QMainWindow is a class which provides a framework for building a graphical view, this is the reason why this class is extended by Login and MainWindow classes. The other class, QObject is a base class for many classes in Qt. It provides a wide set of features. The QObject class is extended by SipPhoneImpl class as well because of usage of signals, which will be explained more in deep in the upcoming paragraphs. Figure 4: Class diagram preview In the

VOIP Project: Understanding VOIP - Part 4

Image
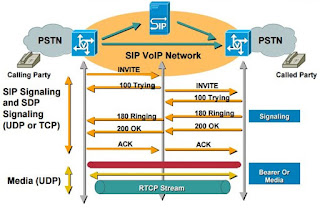
In order to be able to continue developing further more the VOIP system we need to know which are the components that can be used to build a VOIP system and how they are implemented. In the book titled “Packet Guide to Voice over IP” VOIP is: “…exactly what the name indicates—sending voice (and video) over an IP-based network. This is completely different than the circuit-switched public telephone network…” ( Hartpence, 2013, p. 2). The fact that VOIP “…is completely different than the circuit-switched public tele‐ phone network…” ( Hartpence, 2013, p. 2)makes it possible to do things that are not possible with the standard telephony system, like programming customized applications based on individual needs. VOIP does not only allows to transmit voice over IP but video as well, and this makes communication through VOIP even richer in features. Comparison with traditional telephony VOIP gives the opportunity to use internet connection in order to implement system, while the trad

Exercise Intermediate, part 4: Chat application - Complete chat

Image
This part is a continuation of Exercise Intermediate, part 3: Chat application - Register and Login so before starting this part of the exercise make sure to have completed the part 3 first. At part 3 we managed to open an empty chat window. In this part we will work with that window in order to add the chat functionality there. We should start by creating the graphical user interface. In order to do so we need to change the view of chat window as shown in the figure 1. Figure 1: Organize GUI of chat window After adding the graphical elements on the chat window as shown in figure 1, we need to remove the default items from the list where we will show the users. In order to be able to do so, we need to click on the list and at the properties panel, at the model attribute, we need to click the button with 3 dots as shown in the figure 2. Figure 2: Open list model At the window that pops up shown in figure 3, we need to remove all the elements and than press OK. Figure 3: Clea

Exercise Intermediate, part 3: Chat application - Register and Login

Image
This part is a continuation of Exercise Intermediate, part 2: Chat application - Complete DatabaseInteraction so before starting this part of the exercise make sure to have completed the part 2 first. First let's create the Login form. In order to do so, we need to follow the same steps as we do to create when creating a normal class, except of choosing Java Class... we need to choose JFrame Form... as shown in the figure 1. Figure 1: Create JFrame Form for the Login After we follow the steps shown above we need to give a name to the JFrame Form as shown in the figure 2. Figure 2: Give Login name to the JFrame Form After we create the Login form we need to create its layout. We need to add 3 labels, 1 for the username, 1 for password and 1 to display the errors. We need also 1 text field and one password field in order to get input from the user and in the end we need to add the login button as shown in the figure 3. Figure 3: Create the layout of the login form In or