Exercise Intermediate, part 3: Chat application - Register and Login
This part is a continuation of Exercise Intermediate, part 2: Chat application - Complete DatabaseInteraction so before starting this part of the exercise make sure to have completed the part 2 first.
First let's create the Login form. In order to do so, we need to follow the same steps as we do to create when creating a normal class, except of choosing Java Class... we need to choose JFrame Form... as shown in the figure 1.
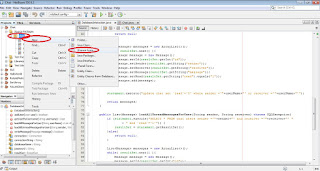
Figure 1: Create JFrame Form for the Login
After we follow the steps shown above we need to give a name to the JFrame Form as shown in the figure 2.

Figure 2: Give Login name to the JFrame Form
After we create the Login form we need to create its layout. We need to add 3 labels, 1 for the username, 1 for password and 1 to display the errors. We need also 1 text field and one password field in order to get input from the user and in the end we need to add the login button as shown in the figure 3.

Figure 3: Create the layout of the login form
In order to complete the layout we need to change to font of the label which will show the errors. In order to do so we need to click the button shown in the figure 4 when having selected the label which will show the error.

Figure 4: Change foreground of the error label
After we click on the button shown in figure 4 we get a window same as the one shown in figure 5. In this window we need to select one of the red colors squares shown in the middle same as marked in figure 5.

Figure 5: Select color for error label
After we complete the above actions we add action on login button. To do so we right click on login button and than select Event than Action and in the end actionPerformed as shown in the figure 6.

Figure 6: Add event actionPerformed on login button
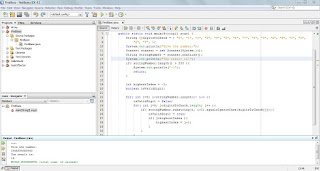
We edit the generated form after we follow the steps of the figure 6 as shown in the figure 7. We edit the body of invokeLater inside main method as shown in the figure 7 as well. In the same file we need to add the method createConnection which will function like a setter, creating a new instance of DatabaseInteraction class, for the dbi variable which we need to add in the same file together with logedUser variable of type User as shown in the same figure. Now let's take a closer look to the generated method. As shown in the figure 7 we call getUserByUsername method of DatabaseInteraction class through dbi variable, an instance of DatabaseInteraction class. At this point we do not risk a NullPointerException because we initialize the dbi variable when the loginForm is shown, by calling the createConnection method in the same file as shown in the figure 7, which means that we do not have the chance to click on the login button before the instance is created. When we call the getUserByUsername method we may get a SQLException which we need to handle in this level, this is why we put the call toward this method within a try catch block, which means if the execution of the getUserByUsername is OK without an exception the try block gets executed and we get a User instance in response which we store at logedUser variable otherwise the try block gets executed and in that case we show the error message at the error label. In the try block we after we call the method we have an if statement because we need to check if the getUserByUsername method has not returned an instance of User class but instead it returns null, or if the password of the returned user matches with the password given in the password field in the login form. In case we get a null response from the getUserByUsername method it means that the given username in the login form is not registered in the database, otherwise if the instance returned by the getUserByUsername method is not null but the password of the returned instance does not match it means that the username is registered into the database but the password stored in the database is different with the given one. In this cases we display the message into the error label as shown in the figure 7, otherwise we display the Chat window which we will implement later on.

Figure 7: Edit Login.java file for the login functionlaity
Another functionality that we need to add at the first window is the register functionality which would make possible for a new user to be registered in the system. We follow the same steps that we did for the login window, but change the name from Login to Register as shown in the figure 8.

Figure 8: Create the register form
After we create the register form we need to create its layout. On top of the form we need to add the label which will display the errors with the same font that we used for the error label on login form. After the error label we need to add the labels for the username password name and the last name and their respective text fields and the password field for the password. We will also add the register button where we will implement the registration logic and the back button which will get us back at the login window.

Figure 9: Create the layout of register form
After we add the register form we add the register button on login form as shown in the figure 9, which will be the first form that will be displayed when the application will be executed. The register button on login form will open the register form.

Figure 10: Add the register button on login form
We add action on register button same as we did with the login button. Right click on register button and than follow the steps shown in the figure 11.

Figure 11: Add actionPerformed on register button
We need to edit the generated method after the above action as shown in the figure 12. Create an instance of register form, on the constructor of which we pass the DatabaseInteraction instance which we declared when we added the code for the login functionality shown in the figure 7 in order to avoid creating a new instance of the DatabaseInteraction class at the register form and as a consequence a new connection with database, because the process of the creation of connection is time consuming and causes a bad user experience. As you can see from figure 12 We get an error at the line where we create the instance of register form because we do not have a constructor of Register form that gets as parameter a DatabaseInteraction instance, we will add that constructor bellow. After we create the instance of Register form we call the setVisible method of this class with parameter true.

Figure 12: Implementation of register button on login form
As mentioned above we need to create a constructor on the Register class which will get as parameter an instance of DatabaseInteraction class. Figure 13 bellow shows the creation of this constructor, which will function as a simple setter of the DatabaseInteraction instance taken as parameter into the variable dbi declared in the Register class.

Figure 13: Constructor of Register class which gets as parameter DatabaseInteraction instance
After completing the navigation from the login form to the register form we continue by adding the action on the register button on the register form as shown in the figure 14 bellow.

Figure 14: Add actionPerformed on register button of register form
We need to edit the generated method as shown in the figure 15. First we need to create an instance of User class and than set its fields with the values of the input given by the user through the text fields and password field in the register form. After we set all the fields of User instance we call with this instance the addUser method of DatabaseInteraction class, which gets as parameter an instance of User class which we call through the dbi instance, to which we gave value through the constructor of Register class that we added earlier. We need to surround the call toward the addUser class with try and catch because it throws SQLException which must be handled. If the addUser method is executed without any exception we need to display a success message at the message label and set the foreground blue, otherwise we need to display the error.

Figure 15: Implementation of registration
At the register form we need to add actionPerformed on back button as well. Right click on back button and follow the steps shown on the figure 16.

Figure 16: Add actionPerformed on back button of register form
At the generated method we just need to call setVisible method of Register class with parameter false, as shown in figure 17, in order to hide the registration form and get back to the login form.

Figure 17: Hide the register form
Now that we have completed the registration process we need to continue the login process. We do not need the Chat class as a simple class, but we need a JFrame Form with that name, because it will be the window where we will display the conversations. So first we need to delete the Chat class by right clicking on the Chat class and than pressing Delete as shown in the figure 18.

Figure 18: Delete the Chat class
After we delete the Chat class we need to replace it with a JFrame Form. We follow the same steps that we did with login and registration form sown in the figure 19. Right click on chat package -> New -> JFrame Form... .

Figure 19: Create a new JFrame Form for Chat window
After we follow the steps shown above we need to give a name to our new JFrame Form which in this case will be Chat as shown in the figure 20 bellow.

Figure 20: Give the name to the Chat window
Now that we created the new JFrame form we need to add a constructor to it in order to get as parameter the DatabaseInteraction instance as we did with the register form. This constructor on Chat class is shown in the figure 21 bellow.

Figure 21: Create the new constructor of Login class
Now that we added the constructor that gets as parameter the instance of the DatabaseInteraction class to the Login class we need to call it from the login window when the login button is clicked, in order to do so we need to get back to the login window and replace the comment "Open chat window..." of figure 7 with the code shown in figure 22.

Figure 22: Open Chat window from login window
As shown in figure 22 we create initially the instance of Chat class by calling the constructor that we created above where we pass as parameter the instance of DatabaseInteraction class and than we call the method setVisible of Chat class with parameter true in order to show it and than we call method setVisible with parameter false of the login window.
In the part 4 and the last one of the series of exercises for the chat application we will complete the application by adding the chatting functionality.
(please report broken link in the comment)
First let's create the Login form. In order to do so, we need to follow the same steps as we do to create when creating a normal class, except of choosing Java Class... we need to choose JFrame Form... as shown in the figure 1.

Figure 1: Create JFrame Form for the Login
After we follow the steps shown above we need to give a name to the JFrame Form as shown in the figure 2.

Figure 2: Give Login name to the JFrame Form
After we create the Login form we need to create its layout. We need to add 3 labels, 1 for the username, 1 for password and 1 to display the errors. We need also 1 text field and one password field in order to get input from the user and in the end we need to add the login button as shown in the figure 3.

Figure 3: Create the layout of the login form
In order to complete the layout we need to change to font of the label which will show the errors. In order to do so we need to click the button shown in the figure 4 when having selected the label which will show the error.

Figure 4: Change foreground of the error label
After we click on the button shown in figure 4 we get a window same as the one shown in figure 5. In this window we need to select one of the red colors squares shown in the middle same as marked in figure 5.

Figure 5: Select color for error label
After we complete the above actions we add action on login button. To do so we right click on login button and than select Event than Action and in the end actionPerformed as shown in the figure 6.

Figure 6: Add event actionPerformed on login button
We edit the generated form after we follow the steps of the figure 6 as shown in the figure 7. We edit the body of invokeLater inside main method as shown in the figure 7 as well. In the same file we need to add the method createConnection which will function like a setter, creating a new instance of DatabaseInteraction class, for the dbi variable which we need to add in the same file together with logedUser variable of type User as shown in the same figure. Now let's take a closer look to the generated method. As shown in the figure 7 we call getUserByUsername method of DatabaseInteraction class through dbi variable, an instance of DatabaseInteraction class. At this point we do not risk a NullPointerException because we initialize the dbi variable when the loginForm is shown, by calling the createConnection method in the same file as shown in the figure 7, which means that we do not have the chance to click on the login button before the instance is created. When we call the getUserByUsername method we may get a SQLException which we need to handle in this level, this is why we put the call toward this method within a try catch block, which means if the execution of the getUserByUsername is OK without an exception the try block gets executed and we get a User instance in response which we store at logedUser variable otherwise the try block gets executed and in that case we show the error message at the error label. In the try block we after we call the method we have an if statement because we need to check if the getUserByUsername method has not returned an instance of User class but instead it returns null, or if the password of the returned user matches with the password given in the password field in the login form. In case we get a null response from the getUserByUsername method it means that the given username in the login form is not registered in the database, otherwise if the instance returned by the getUserByUsername method is not null but the password of the returned instance does not match it means that the username is registered into the database but the password stored in the database is different with the given one. In this cases we display the message into the error label as shown in the figure 7, otherwise we display the Chat window which we will implement later on.

Figure 7: Edit Login.java file for the login functionlaity
Another functionality that we need to add at the first window is the register functionality which would make possible for a new user to be registered in the system. We follow the same steps that we did for the login window, but change the name from Login to Register as shown in the figure 8.

Figure 8: Create the register form
After we create the register form we need to create its layout. On top of the form we need to add the label which will display the errors with the same font that we used for the error label on login form. After the error label we need to add the labels for the username password name and the last name and their respective text fields and the password field for the password. We will also add the register button where we will implement the registration logic and the back button which will get us back at the login window.

Figure 9: Create the layout of register form
After we add the register form we add the register button on login form as shown in the figure 9, which will be the first form that will be displayed when the application will be executed. The register button on login form will open the register form.

Figure 10: Add the register button on login form
We add action on register button same as we did with the login button. Right click on register button and than follow the steps shown in the figure 11.

Figure 11: Add actionPerformed on register button
We need to edit the generated method after the above action as shown in the figure 12. Create an instance of register form, on the constructor of which we pass the DatabaseInteraction instance which we declared when we added the code for the login functionality shown in the figure 7 in order to avoid creating a new instance of the DatabaseInteraction class at the register form and as a consequence a new connection with database, because the process of the creation of connection is time consuming and causes a bad user experience. As you can see from figure 12 We get an error at the line where we create the instance of register form because we do not have a constructor of Register form that gets as parameter a DatabaseInteraction instance, we will add that constructor bellow. After we create the instance of Register form we call the setVisible method of this class with parameter true.

Figure 12: Implementation of register button on login form
As mentioned above we need to create a constructor on the Register class which will get as parameter an instance of DatabaseInteraction class. Figure 13 bellow shows the creation of this constructor, which will function as a simple setter of the DatabaseInteraction instance taken as parameter into the variable dbi declared in the Register class.

Figure 13: Constructor of Register class which gets as parameter DatabaseInteraction instance
After completing the navigation from the login form to the register form we continue by adding the action on the register button on the register form as shown in the figure 14 bellow.

Figure 14: Add actionPerformed on register button of register form
We need to edit the generated method as shown in the figure 15. First we need to create an instance of User class and than set its fields with the values of the input given by the user through the text fields and password field in the register form. After we set all the fields of User instance we call with this instance the addUser method of DatabaseInteraction class, which gets as parameter an instance of User class which we call through the dbi instance, to which we gave value through the constructor of Register class that we added earlier. We need to surround the call toward the addUser class with try and catch because it throws SQLException which must be handled. If the addUser method is executed without any exception we need to display a success message at the message label and set the foreground blue, otherwise we need to display the error.

Figure 15: Implementation of registration
At the register form we need to add actionPerformed on back button as well. Right click on back button and follow the steps shown on the figure 16.

Figure 16: Add actionPerformed on back button of register form
At the generated method we just need to call setVisible method of Register class with parameter false, as shown in figure 17, in order to hide the registration form and get back to the login form.

Figure 17: Hide the register form
Now that we have completed the registration process we need to continue the login process. We do not need the Chat class as a simple class, but we need a JFrame Form with that name, because it will be the window where we will display the conversations. So first we need to delete the Chat class by right clicking on the Chat class and than pressing Delete as shown in the figure 18.

Figure 18: Delete the Chat class
After we delete the Chat class we need to replace it with a JFrame Form. We follow the same steps that we did with login and registration form sown in the figure 19. Right click on chat package -> New -> JFrame Form... .

Figure 19: Create a new JFrame Form for Chat window
After we follow the steps shown above we need to give a name to our new JFrame Form which in this case will be Chat as shown in the figure 20 bellow.

Figure 20: Give the name to the Chat window
Now that we created the new JFrame form we need to add a constructor to it in order to get as parameter the DatabaseInteraction instance as we did with the register form. This constructor on Chat class is shown in the figure 21 bellow.

Figure 21: Create the new constructor of Login class
Now that we added the constructor that gets as parameter the instance of the DatabaseInteraction class to the Login class we need to call it from the login window when the login button is clicked, in order to do so we need to get back to the login window and replace the comment "Open chat window..." of figure 7 with the code shown in figure 22.

Figure 22: Open Chat window from login window
As shown in figure 22 we create initially the instance of Chat class by calling the constructor that we created above where we pass as parameter the instance of DatabaseInteraction class and than we call the method setVisible of Chat class with parameter true in order to show it and than we call method setVisible with parameter false of the login window.
In the part 4 and the last one of the series of exercises for the chat application we will complete the application by adding the chatting functionality.
(please report broken link in the comment)

Comments
Post a Comment