Exercise Intermediate, part 4: Chat application - Complete chat
This part is a continuation of Exercise Intermediate, part 3: Chat application - Register and Login so before starting this part of the exercise make sure to have completed the part 3 first.
At part 3 we managed to open an empty chat window. In this part we will work with that window in order to add the chat functionality there. We should start by creating the graphical user interface. In order to do so we need to change the view of chat window as shown in the figure 1.
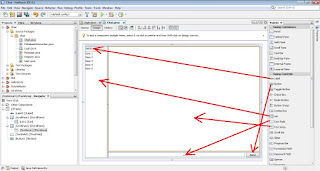
Figure 1: Organize GUI of chat window
After adding the graphical elements on the chat window as shown in figure 1, we need to remove the default items from the list where we will show the users. In order to be able to do so, we need to click on the list and at the properties panel, at the model attribute, we need to click the button with 3 dots as shown in the figure 2.

Figure 2: Open list model
At the window that pops up shown in figure 3, we need to remove all the elements and than press OK.

Figure 3: Clean the default elements of the list
At the list that we cleaned above we will show all the user that are registered into our database. At the time of creation of our database interaction class at part 2, Exercise Intermediate, part 2: Chat application - Complete DatabaseInteraction I forgot to add a method that would extract us all the registered users from the database except the logged in user, so we need to edit the DatabaseInteraction class and add the missing method. This method shown at figure 4 is similar to the method getUserByUsername that we had already created, but we need to edit the query in order to return all the users that have not the username of the current user. Being that we will have all users except of the current user as result of this method, we will need to return a list of users from this method.

Figure 4: Add loadAllUsersWithoutCurrent method at DatabaseInteraction class
Now as we may see the loadAllUsersWithoutCurrent method requires as parameter the current logged in user, so from the Login class we need to pass to the Chat class the current user being logged in. In order to do so we need to edit the creation of Chat instance which is created when we click the login button at Login window as shown in figure 5.

Figure 5: Add current user when creating the chatForm instance
As shown in the figure 5, we get an error if we add that parameter because we have not created a constructor that gets 2 parameters yet, so we need to add this new parameter to the constructor at the Chat class to fix this problem as shown in figure 6 bellow.

Figure 6: Add current user parameter to Chat constructor and load all users
You may see from figure 6 the loading of all users from the database as well by calling the loadAllUsersWithoutCurrent method that we created above in the DatabaseInteraction class and than we add the usernames of the users at the list that we added on the Chat window.
After we add the users to the list we want to be able to select them in order to chat with them. In order to do so, we need to add a mouse clicked event. In order to add that event the steps shown in figure 7 must be followed, right click on the list, mouse over on event, than mouse and than click on mouseClicked event.

Figure 7: Add mouse click event on the list
After following the above steps, the method jList1MouseClicked is generated. We should add an instance variable remoteUser which will hold the username of the user that we have selected to chat with. First, when the user clicks on the list we need to check if the new selected element is different from the previous selected element, than we need to set the remoteUser variable with the value of username of the newly selected user. The next step is to load all the messages for the selected user by calling the method loadAllMessagesForUser which will return all the messages for the logged in user, from which we will filter only the messages for the selected remote user. The implementation of this logic is shown in the figure 8 bellow.

Figure 8: Implementation of jList1MouseClicked method
After we add the functionality of selecting the user with who we will chat, we need to add the functionality of sending the message to the remote user. In order to do so, on the design mode of Chat window we need to add an event to the Send button. In order to do so we need to right click on the send button and than send the mouse over Events context menu as shown in the figure 9.

Figure 9: Add event on Send button
After putting the mouse on Events the menu from which can be selected the type of the event will show. In this case we will select Action and than will click on the actionPerformed type of event. This steps are shown in figure 10 bellow.

Figure 10: Add actionPerformed on Send button
On the generated method we will call the method writeMessage of DatabaseIrnteraction class. This method requires a message object as parameter, so before calling the writeMessage method we need to create the message object as shown in figure 11 and than we must add the jTextField1 to the jTextArea1 with the name of the logged in user and than clean the text from jTextField1.

Figure 11: Sending message
We will need to update the jTextArea1 with the new messages sent by the remote user continuously, in order to do so we need to add a timer to our application. We will user this timer to call a method called updateConversation which will read the unread messages from database and will show it to jTextArea1. We need to declare an instance variable of type Timer and we initialize and start the timer at the constructor of Chat class. Figure 12 shows the implementation of timer in our application.

Figure 12: Implementation of timer
As you can see from the figure 12 above at line 53, when we call the updateConversation method we get an error because we have not implemented this method yet. Figure 13 bellow shows this method implemented. Within the method updateConversation we check if we have selected a remote user from the list of users, so if the remote user is not null we try to read the new messages from this user by calling the loadAllUnreadMessages method of the DatabaseInteraction class and the list of messages returned by this method we append them into our jTextArea1.

Figure 13: Implementation of updateConversation method
This step completes the core functionalities of our chat application. We can test this application across internet, within intranet or even in the same pc. We can run two instances of our application logged in with two different accounts. I have created several users and in the figure 14 bellow is shown a test that I have made by logging into the two different instances the application with two different users, programming and test1. The window on the left is the window of programming user where I have selected as destination the test1 user and on the right I have been logged in as test1 user and I have selected as destination programming user. After typing a test and pressing the send button from the window of programming user it will appear almost immediately on the window of test1 user thanks to the timer that we implemented above.

Figure 14: Test of chat application
Until this point we have completed the core functionality of a chat application, but of course we can add a lot of features to it. Bellow I will show the adding of login functionality and the display of the name of the logged in user. In order to show the name of logged in user we need to add 2 new labels, 1 that will show the text "Logged in as:" and one next to it that will shown the name of the user. On the window we need to add the logout button for the logout functionality as shown in the figure 15.

Figure 15: Add GUI elements to display current user and to log out
In order to display the logged in user, at the constructor of the Chat class we need to set the value of the currentUser to the label that we want to display the username of the user as shown in figure 16.

Figure 16: Set the username as the text of the label
The next step, to add the logout functionality, requires that we add a mouseClicked event on the Logout button as shown in figure 17.

Figure 17: Add event on Logout button
Within the generated method we need to create an instance of Login class, but in this case we will not call the constructor without parameters, but we will call a constructor with a DatabaseInteractin parameter which we will create bellow, than we will show the newly created instance and we will hide the current one as shwon in figure 18.

Figure 18: Logging out
The last step to complete this exercise is to create the constructor that we mentioned above and which is shown in figure 19 bellow. This constructor of Login class is the same as the constructor without parameter except the added parameter and the set of this value to the dbi instance variable of this class.
(please report broken link in the comment)


Comments
Post a Comment